How to Manage Table Maintenance Dialogs in SAP ERP
I want to write about table maintenance dialogs in SAP ERP a bit – partly because they’re one of the most-used features of SAP development, and partly because some of their better functionality is hidden quite well. Today, I’ll discuss the basics.
Recommended Now
All-new Echo Dot Smart speaker with Alexa
This bundle includes Echo Dot (3rd Gen) Charcoal and Philips Hue White A19 Medium Lumen Smart Bulb, 1100 Lumens. Built in Smart Home hub. Ask Alexa to control Zigbee-compatible devices. No additional Philips Hue hub required. Two choices for easy smart lighting - Start setting the mood with Hue Smart bulbs and your Echo device, supporting up to 5 Hue Bluetooth & Zigbee smart bulbs. Add the Hue Hub for whole-home smart lighting (up to 50 light points) and bonus features.
Check it out on amazon.com →Generating a table maintenance dialog in SAP ERP
Creating a table maintenance dialog for a table has many advantages. You can maintain data much more comfortable than via the Data Browser (SE16/SE16N) and it’s possible to use the SAP Change and Transport System to move table entries into subsequent systems. Moreover, there’s very useful advanced functionality, such as maintenance views or adding application logic to your maintenance dialog.
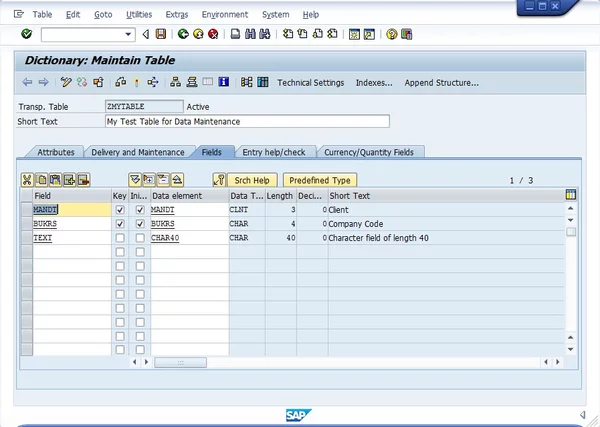
Test Table for Maintenance Generator
Let’s start with the creation of a maintenance dialog. The screenshot above shows you a test table I created – a simple table that lets me record additional text for company codes. To create a table maintenance dialog, select Utilities > Table Maintenance Generator from the menu bar. You’re taken to a dialog, where you have to provide details for the table maintenance dialog.
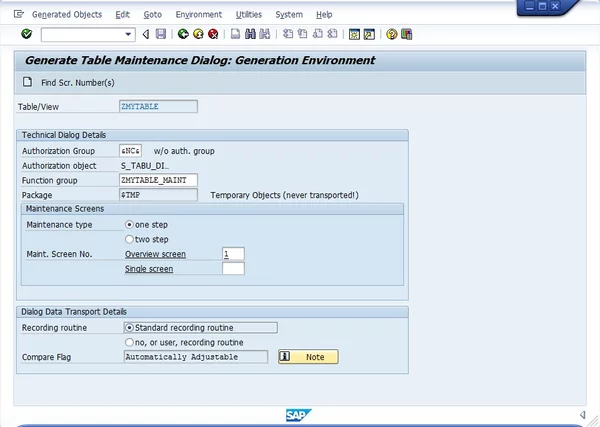
Generation of Table Maintenance Dialog
The following fields are available:
- The authorization group is an object that can be provided if the access to table maintenance should be restricted by authorization. The user has to have the appropriate authorization for the object S_TABU_DIS. If you don’t want to restrict entries, enter the value &NC& here.
- The function group is created automatically by the table maintenance generator. It will contain the necessary ABAP programming objects.
- The maintenance type decides whether you can enter data directly in the table overview (one step) or if you have to double-click an entry to be taken to the detail screen (two step).
- For the maintenance screen numbers, you should click Find Scr. Number(s) and then select Propose Screen Numbers to have the system select them for you.
- The recording routine decides whether table entries have to be recorded in a transport request (standard Recording) or if you can make entries without a request (no recording).
- The compare flag is relevant if you work with Business Configuration Sets. You can control the integration into these sets here.
After you’ve made your entries, click the Create icon (![]() ) to generate your table maintenance dialog. If everything goes well, you can now call transaction SM30 and enter your table name to be presented with a table maintenance screen where you can maintain the table’s content.
) to generate your table maintenance dialog. If everything goes well, you can now call transaction SM30 and enter your table name to be presented with a table maintenance screen where you can maintain the table’s content.
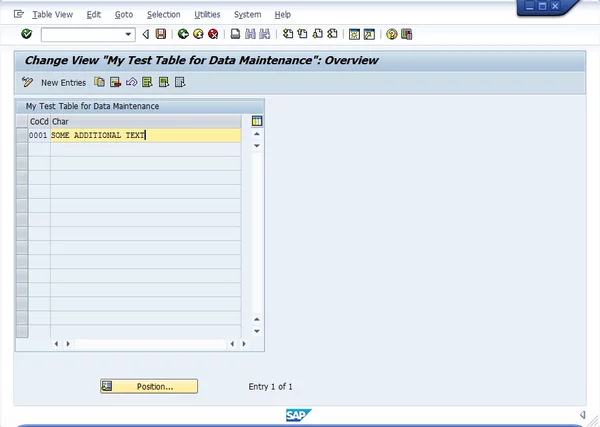
Table Maintenance with Transaction SM30
That’s it already – you can now maintain entries for your table. Read on to learn how to re-generate the table maintenance dialog if the underlying table changes.
Modifying a table maintenance dialog after a table change
Let’s assume you have to change your table after the table maintenance dialog was already generated. You don’t want to delete the entire table and re-create it, especially since there might be a lot of data in it already. In my example, I’ve added another field to my table that I want to be able to maintain.
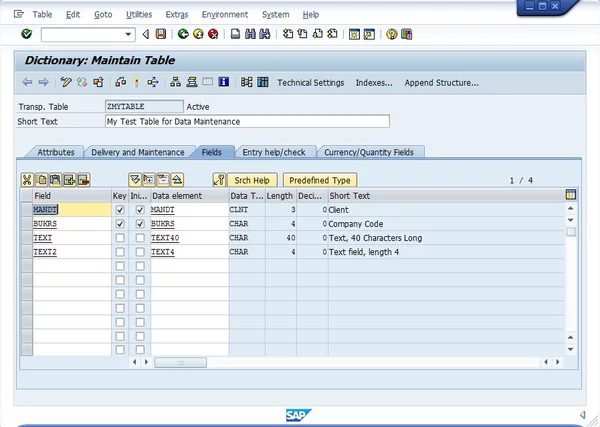
Test table was changed
If I would open the maintenance dialog now, I would still see only one field that can be maintained. That means that the generated function group must be updated so it knows about the new field. Luckily, we don’t have to do that ourselves, but we can rely on the table maintenance generator again. Open it via Utilities > Table Maintenance Generator and click the edit button (![]() ).
).

Re-Generate Maintenance Dialog
In the popup that appears, select the reason for change. In my case, it was a new field, but it could also be something else – you can select multiple options. In the next popup, provide the details. I’m using a one step maintenance dialog, so only the overview screen needs to be re-generated. Also, I did add a normal field and no key field. Continue to re-generate the table maintenance dialog.
After the system has generated the function group again, you should now be able to maintain the new fields in your maintenance dialog also.
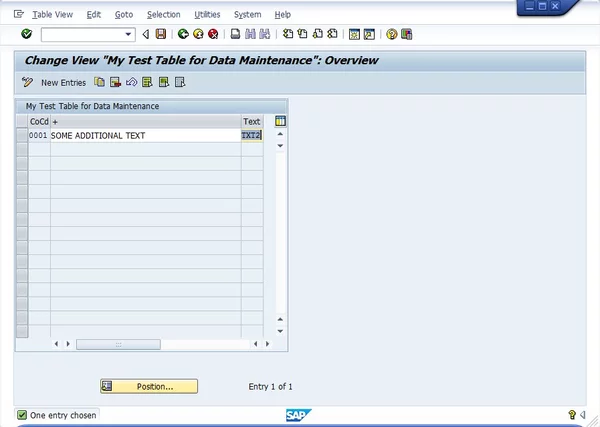
Table Maintenance Dialog Updated
In the next posts, I’ll discuss ways to make this dialog more usable. For example, we will implement a foreign key check so I can only enter data for company codes that already exist. I will also create a maintenance view to display additional information that makes the maintenance of data easier for the end user.

